eCozy App
You have questions about your eCozy Central Unit or want to know more? Then you are right here!
What is the eCozy app?
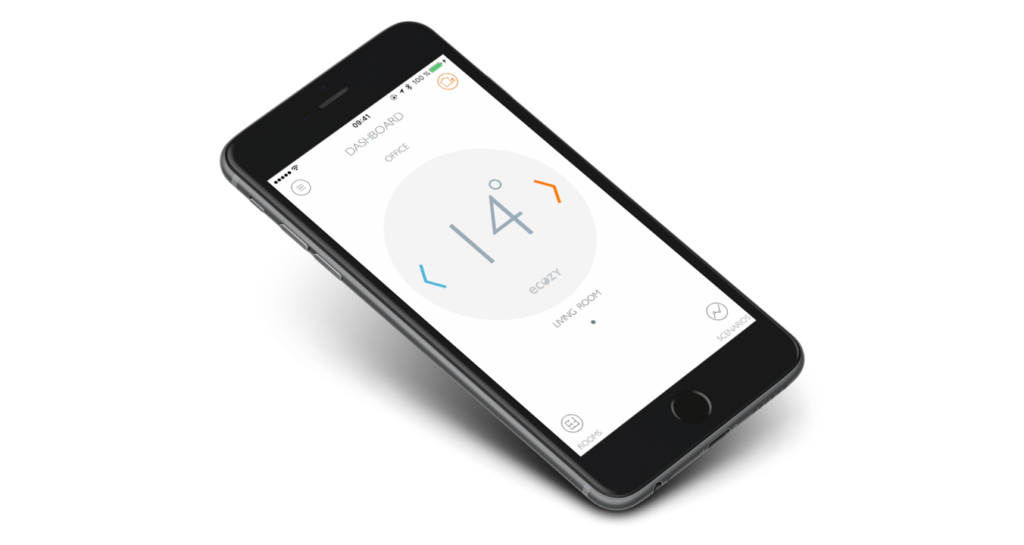
The eCozy app lets you control your eCozy thermostat. You can change the temperature directly on each thermostat or can create heating plans and automate heating control. The app also offers more great features, such as a fire warning, or special “GoAway” and “WarmUp” modes.
Questions and answers
iOS
Is there an eCozy iOS app?
You may find and download eCozy app in App Store
Can few people control thermostats from different devices?
Yes, you need to have eCozy app on each smartphone and login with the same account.
Can I control multiple eCozy thermostats with my eCozy app?
You can have up to two locations per account, and up to 16 eCozy devices (thermostats, thermosensors) per location.
Can I schedule eCozy to work fully automatically?
Setting a scenario mode will make the system to work fully automatically
Can I test an App before buying a product? (Where can I do it?)
Yes, you may download an eCozy app from App Store or Google Play before buying a product. Create an account, and you will have an access to «virtual home». You will be able to try almost all features of the real system, control it, change the settings and etc. When you purchase eCozy Smart Heating Solution, you can use the same account you have used before.
Do I have to install certain updates on my phone in order to use eCozy?
No, updates regarding your phone will not take any effect, therefore, it is not required. On the other hand, updates regarding app. versions of eCozy are highly recommended since they are developed for better productivity of your system.
Does eCozy support other devices apart from smartphones and what are those?
Yes, eCozy system can also be used on Tablets.
Does the eCozy app requires GPS to be activated for advanced heating?
Your Location Services should be turned on if you want features like “warm up” to work.
eCozy uses a signal from my smartphone to control my heating based on my presence or absence. Does that mean eCozy always know where I am?
If you turn on your location services, then yes, eCozy knows where you are, and that is only necessary if you would like to let the system know whether to heat up your residence in “warm up” mode.
Is it possible to use eCozy App with more than one signed user?
Yes, you can use eCozy App on several devices with one registered account.
The room temperature shown in application and the real temperature in the room are different, why is it so?
Temperature shown on eCozy Thermostat display and on the dashboard of eCozy App is your target temperature you would like to have.
How do I choose which mode I want my system to be in?
After you have successfully connected to ecozy_generic WLAN Network, please open the eCozy app. App will give you the possibility to choose Local or Remote modes of operation. Short description of each mode is provided. Click to choose desired mode.
How do I connect to eCozy Central Unit?
Logo on eCozy Central Unit must blink in White only
In case logo on eCozy Central Unit blinks white and blue, use a pin and reset eCozy Central Unit through a reset port at the front side of the eCozy Central Unit
Open your settings
Open WLAN settings
Choose network called «ecozy_generic»
Password ecozy_generic
How should I setup Local Mode?
In order to setup Local Mode, create name of your WLAN network, which will be created by your eCozy Central Unit. After that, you have to create a minimum 6 digit password and confirm it. After successful creation of the Local Mode, logo on eCozy Central Unit will blink white and blue, and then it should light in Blue.
How should I setup Remote Mode?
In order to setup Remote Mode, give your eCozy Central Unit a name, then enter the exact name and password of your home WLAN network. After successful creation of the Remote Mode, the logo on eCozy Central Unit will blink white and blue, then turn White, as well as one of LED at the front should light in green.
How to add a new room?
Open the ‘room’ menu in your app by clicking on ‘rooms’ button in the bottom left corner.
Click on the ‘pencil’ to activate edit mode.
Click on the ‘add room’ button to add a new room.
How to add eCozy thermostat to the room?
After you have successfully initialized eCozy thermostat into the system, you have to place that thermostat into the room.
You will have your list of available rooms on the screen.
Simply click on the desired room or create a new one.
How to add an extra eCozy thermostat?
Remove a battery compartment cover and set four AA-type batteries with respecting polarities.
Connect the battery compartment cover with the installed batteries to the thermostat housing. If the batteries are installed correctly, the thermostat indicator will display a green wrench key for a short time, which means that the valve piston rod moves to the extreme far position from the valve and after the icon is faded, the thermostat could be mounted on a radiator and can be connected to ZigBee network.
Place two fingers on top and the bottom of the screen and keep them until blue antenna appears on the display.
Open menu in your app by clicking on ‘triple line’ button in top left corner.
Open ‘eCozy Devices’ menu.
Click on ‘add thermostat’ and wait until eCozy thermostat is successfully connected to your system.
How to change the name of the location?
Open menu in your app by clicking on ‘triple line’ button in top left corner.
Open ‘My Locations’ menu.
Click on the ‘pencil’ to activate edit mode.
Enter a desired name for your Location.
How to check who was/is connected to the app?
Open menu in your app by clicking on ‘triple line’ button in top left corner.
Open ‘Connected Devices’ menu.
Here you can observe who is connected to the system.
How to create an account?
In order to create a new account, press on ‘sing up’ button. You have to enter your email address, and create a password to your account. You will be able to change both of these fields later in app settings.
How to delete eCozy thermostat?
Open menu in your app by clicking on ‘triple line’ button in top left corner.
Open ‘eCozy Devices’ menu.
Choose eCozy thermostat which you would like to delete from the system and swipe its name to the left until the «delete» button appears.
Click on «delete» button and confirm or cancel your decision.
How to delete a room?
Open the ‘room’ menu in your app by clicking on ‘rooms’ button in bottom left corner.
Choose the room which you would like to delete and swipe its name to the left until the «delete» button appears.
Click on «delete» button and confirm or cancel your decision.
How to delete a scenario?
Open the ‘scenario’ menu in your app by clicking on ‘scenarios’ button in bottom right corner.
Choose the scenario which you would like to delete and swipe its name to the left until the «delete» button appears.
Click on «delete» button and confirm or cancel your decision.
How to edit my profile?
Open menu in your app by clicking on ‘triple line’ button in the top left corner.
Open ‘Profile’ menu.
Here you can observe and edit your profile settings such as your name, email address and password.
How to add first eCozy thermostat?
Remove a battery compartment cover and set four AA-type batteries with respecting polarities.
If the batteries are installed correctly, the thermostat indicator will display a green wrench key for a short time, which means that the valve piston rod moves to the extreme far position from the valve and after the icon is faded, the thermostat could be mounted on a radiator and can be connected to ZigBee network. Connect the battery compartment cover back to the Thermostat.
Place two finger on top and the bottom of the screen and keep them until blue antenna appears on the display.
In your app click on «add thermostat» and wait until eCozy thermostat is successfully connected to your system.
How to move eCozy thermostat to another room?
Open menu in your app by clicking on ‘triple line’ button in the top left corner.
Open ‘eCozy Devices’ menu.
Click on the eCozy thermostat you would like to add to the room.
When you open a specific eCozy thermostat, there will be a possibility to choose a room to which you want that thermostat to be placed.
Simply click on the desired room.
How to name specific connected device?
Open menu in your app by clicking on ‘triple line’ button in top left corner.
Open ‘Connected Devices’ menu.
Click on the desired device you would like to rename.
Click on the ‘pencil’ to activate edit mode.
Enter a desired name for your device.
What are the advantages of Local mode/Remote mode?
Local mode is necessary when you do not have an Internet access or due to security reasons do not wish to make your Central Unit available via the Internet.
Remote mode enables your Central Unit to connect to the existing WLAN network. It enables you to manage the Central Unit no matter where you are.
How to rename eCozy thermostat?
Open menu in your app by clicking on ‘triple line’ button in top left corner.
Open ‘eCozy Devices’ menu.
Click on the eCozy thermostat you would like to rename.
Click on the ‘pencil’ to activate edit mode.
Enter a desired name for your thermostat.
How to rename a room?
Open the ‘room’ menu in your app by clicking on ‘rooms’ button in bottom left corner.
Click on the ‘pencil’ to activate edit mode.
Click on the room you would like to rename.
Enter the desired name for the room.
How to rename a scenario?
Open the ‘scenario’ menu in your app by clicking on ‘scenarios’ button in bottom right corner.
Click on the ‘pencil’ to activate edit mode.
Click on the scenario you would like to rename.
Enter the desired name for the scenario.
How to sign in into existing account?
Simply type in the email address and password from the account.
What is «anti-fire» mode and how to turn it on?
‘Anti-fire’ mode is designed as an extra protection of your apartment. Thanks to two thermosensors in eCozy thermostats, they will constantly monitor temperature changes in rooms. In case they notice rapid temperature raise, they will notify you with a notification through an app that something is wrong at your place.
To turn on ‘Anti-fire’ mode
Open menu in your app by clicking on ‘triple line’ button in top left corner.
Open Settings menu by clicking on ‘nut’ button.
Click on the ‘anti-fire’ on/off button to turn it on or turn it off.
What is Central Unit ‘Illumination’ and how to turn it on?
Central Unit ‘Illumination’ is designed to highlight the visual aspects of the eCozy Central Unit. For example, it can be used as a night stand in kids room.
To turn on ‘Illumination’
Open menu in your app by clicking on ‘triple line’ button in top left corner.
Open Settings menu by clicking on ‘nut’ button.
Click on the ‘illumination’ on/off button to turn it on or turn it off.
What is the title of my Central Unit?
You set the title during the process of the first initialization.
Where to download eCozy App?
eCozy App is available on AppStore and Android Market.
How do I switch on the heating while I am on my way home, so that when I am back it's all nice and warm already?
You can use “warm up mode” feature for that purpose, where you set a desired temperature and with turned on location services of your device, the system will know when you will be home, and start heating up accordingly to your arrival time.
How to activate «go away» mode?
Click on the ‘house’ button in top right corner.
In a pop up window click on ‘away’ button to activate the ‘go away’ mode.
How to activate «home» mode?
Click on the ‘house’ button in top right corner.
In a pop up window click on ‘home’ button to activate the ‘home’ mode.
How to activate «warm up» mode?
Your smartphone must be disconnected from the WLAN network your system is connected to.
Click on the ‘pin’ button in top right corner.
Choose the desired method of reaching your location.
Click on the ‘warm up’ button to activate ‘warm up’ mode.
How to add a scenario to the room?
Open the ‘room’ menu in your app by clicking on ‘rooms’ button in bottom left corner.
Click on the desired room you want to set scenario for.
Click on the ‘setup scenario’ button to open the list of available scenarios.
Choose desired scenario and click on it.
How to change a temperature?
Click the left blue arrow to decrease the target temperature.
Click the right red arrow to increase the target temperature.
How to change the room on dashboard?
Swipe the temperature screen to the left or to the right to see the other rooms.
How to check the temperature?
Click in the middle of the temperature to update the target temperature.
How to create a scenario?
Open the ‘scenario’ menu in your app by clicking on ‘scenarios’ button in bottom right corner.
Click on the ‘pencil’ to activate edit mode.
Click on the ‘add scenario’ button to add a new scenario.
Rename new scenario if you want to.
Click on the ‘tick’ to close edit mode.
Click on the new scenario.
Here you can observe the week schedule of the heating.
Click on the ‘pencil’ to activate edit mode.
Choose the desired day you want to create a schedule for and click on the ‘plus’ button.
Set the temperature points throughout the day the way you want them to be. There is a limit of 10 temperature points per day. For detailed temperature set, hold the temperature point to activate zoom.
After completion of setting temperature points, click on ‘plus’ button to copy the schedule for other days, or click on ‘tick’ button to finish.
How to find specific eCozy thermostat?
Open menu in your app by clicking on ‘triple line’ button in top left corner.
Open ‘eCozy Devices’ menu.
Click on the eCozy thermostat you would like to find.
Click on ‘find thermostat’.
Searching thermostat will blink with blue antenna for several seconds.
How to move eCozy thermostat to another room?
Open menu in your app by clicking on ‘triple line’ button in top left corner.
Open ‘eCozy Devices’ menu.
Click on the eCozy thermostat you would like to add to the room.
When you open a specific eCozy thermostat, there will be a possibility to choose a room to which you want that thermostat to be placed.
Simply click on the desired room.
How to rename a scenario?
Open the ‘scenario’ menu in your app by clicking on ‘scenarios’ button in bottom right corner.
Click on the ‘pencil’ to activate edit mode.
Click on the scenario you would like to rename.
Enter the desired name for the scenario.
How to set my «go away» temperature?
Open menu in your app by clicking on ‘triple line’ button in top left corner.
Open Settings menu by clicking on ‘nut’ button.
Click on ‘Go Away’ button to edit the go away temperature.
Choose desired temperature for Go Away.
How to set my «warm up» temperature?
Open menu in your app by clicking on ‘triple line’ button in top left corner.
Open Settings menu by clicking on ‘nut’ button.
Click on ‘Warm Up’ button to edit the warm up temperature.
Choose desired temperature for Warm Up.
What are thermostat ‘locks’ and how to turn them on?
Thermostat ‘locks’ are designed to protect eCozy thermostats from unauthorized changes of the temperature and unauthorized dismantle of the thermostat from the water heating radiators. There are 3 stages of locks
1) Disable Control – user is able to check the temperature, but is unable to make any manual changes. Also, user is able to activate emergency dismantle.
2) Disable Indication – user is not able to check the temperature and not able to make any manual changes. However, user is able to activate emergency dismantle.
3) Disable Dismantling – user is not able to check the temperature, not able to make any manual changes and not able to activate emergency dismantle.
To turn on thermostat ‘locks’
Open menu in your app by clicking on ‘triple line’ button in top left corner.
Open Settings menu by clicking on ‘nut’ button.
Swipe the button to the desired lock level.
Cannot sign up, what is the reason?
Check if you have entered your email correctly, and your password is not less than 8 symbols.
How to edit my profile?
Open menu in your app by clicking on ‘triple line’ button in top left corner.
Open ‘Profile’ menu.
Here you can observe and edit your profile settings such as your name, email address and password.
How to send a device and app log to eCozy Customer Support?
Open menu in your app by clicking on ‘triple line’ button in top left corner.
Open ‘Support’ menu.
Click on ‘Send Log’ button to enter email settings.
Add additional information with the description of the problem.
Send email.
What happens in case if electricity is down?
In case of electricity shut down, eCozy Central Unit will also be off, yet the thermostat can always be adjusted manually (applying fingers on thermostat to change temperature). Thus, it will not affect the performance of the thermostat, it will still provide desired heating.
What happens in case of internet connection loss, and how can I control it during such time?
In case of Internet connection loss, you will not be able to control your system from your smartphone. However, you are able to change the temperature manually on eCozy Thermostats. Also, in case system was working under a scenario, it will continue doing so.
Android
Can a few people control thermostats from different devices?
Yes, they only need to have an eCozy app on their smartphone and login with the same account.
Can I control multiple eCozy thermostats with my eCozy app?
You can have up to two locations per account, and up to 16 eCozy devices (thermostats, thermosensors) per location.
Can I schedule eCozy to work fully automatically?
Yes. You can easily schedule eCozy to work fully automatically – just set a heating scenario in the eCozy App
Can I test an App before buying a product? (Where can I do it?)
Yes, it is possible to download an eCozy app from App Store or Google Play before buying a product. Just create your account, and you will have a «virtual home». You will be able to try almost all features of the real system, control it, change the settings and etc. When you purchase eCozy Smart Heating Solution, you can use the same account you have used before.
Do I have to install certain updates on my phone in order to use eCozy?
No, updates regarding your phone will not take any effect, therefore, they are not required. On the other hand, updates regarding later versions of eCozy are highly recommended since they are developed for better productivity of your system.
Does eCozy support other devices apart from smartphones and what are those?
Yes, eCozy system can also be used on Tablets.
Does the eCozy app requires GPS to be activated for advanced heating?
Your Location Services should be turned on if you want features like “warm up” to work.
How to add an extra eCozy thermostat?
Remove a battery compartment cover and set four AA-type batteries with respecting polarities.
Connect the battery compartment cover with the installed batteries to the thermostat housing. If the batteries are installed correctly, the thermostat indicator will display a green wrench key for a short time, which means that the valve piston rod moves to the extreme far position from the valve and after the icon is faded, the thermostat could be mounted on a radiator and can be connected to ZigBee network.
Place two finger on top and the bottom of the screen and keep them until blue antenna appears on the display.
Open menu in your app by clicking on ‘triple line’ button in top left corner.
Open ‘eCozy Devices’ menu.
Click on «add thermostat» and wait until eCozy thermostat is successfully connected to your system.
eCozy uses a signal from my smartphone to control my heating based on my presence or absence. Does that mean eCozy always know where I am?
If you turn on your location services, then yes, eCozy knows where you are, and that is only necessary if you would like to let the system know whether to heat up your residence in “warm up” mode.
How do I choose which mode I want my system to be in?
After you have successfully connected to ecozy_generic WLAN Network, please open the eCozy app. App will give you the possibility to choose desired mode of operations. Short description of each mode provided. Simply click on the desired mode of operation and enter necessary information.
How do I connect to eCozy Central Unit?
Logo on eCozy Central Unit must blink in White only
In case logo on eCozy Central Unit blinks white and blue, use a pin and reset eCozy Central Unit through a reset button on from side of the eCozy Central Unit, left from 3 LED
Open your settings
Open WLAN settings
Choose network called «ecozy_generic»
Password ecozy_generic
How to add a new room?
Open the ‘room’ menu in your app by clicking on ‘rooms’ button in bottom left corner.
Click on the ‘add room’ button to add a new room.
How to add eCozy thermostat to the room?
After you have successfully initialized eCozy thermostat into the system, you have to place that thermostat into the room.
You will have your list of available room on your screen.
Simply click on the desired room or create a new one.
How to add first eCozy thermostat?
Remove a battery compartment cover and set four AA-type batteries with respecting polarities.
If the batteries are installed correctly, the thermostat indicator will display a green wrench key for a short time, which means that the valve piston rod moves to the extreme far position from the valve and after the icon is faded, the thermostat could be mounted on a radiator and can be connected to ZigBee network. Connect the battery compartment cover back to the thermostat.
Place two finger on top and the bottom of the screen and keep them until blue antenna appears on the display.
In your app click on «add thermostat» and wait until eCozy thermostat is successfully connected to your system.
How to change the name of the location?
Open menu in your app by clicking on ‘triple line’ button in top left corner.
Open ‘My Location’ menu.
Click on ‘edit’ button to activate edit mode.
Enter a desired name for your Location.
How to check who was/is connected to the app?
Open menu in your app by clicking on ‘triple line’ button in top left corner.
Open ‘Connected Devices’ menu.
Here you can observe who is connected to the system.
How to create an account?
In order to create a new account, press on sing up button. you have to enter your email address, and create a password to your account. You will be able to change both of these fields later on in app settings.
How to edit my profile?
Open menu in your app by clicking on ‘triple line’ button in top left corner.
Open ‘eCozy account’ menu.
Here you can observe and edit your profile settings such as your name, email address and password.
How to delete a room?
Open the ‘room’ menu in your app by clicking on ‘rooms’ button in bottom left corner.
Choose the room which you would like to delete and swipe its name to the left until the «delete» button appears.
Click on «delete» button and confirm or cancel your decision.
How to name specific connected device?
Open menu in your app by clicking on ‘triple line’ button in top left corner.
Open ‘Connected Devices’ menu.
Click on the desired device you would like to rename.
Enter a desired name for your device.
How to rename a room?
Open the ‘room’ menu in your app by clicking on ‘rooms’ button in bottom left corner.
Click on ‘edit’ to activate edit mode.
Click on the room your would like to rename.
Enter the desired name for the room.
How to rename a scenario?
Open the ‘scenario’ menu in your app by clicking on ‘scenarios’ button in bottom right corner.
Click on ‘edit’ to activate edit mode.
Click on the scenario you would like to rename.
Enter the desired name for the scenario.
How to delete eCozy thermostat?
Open menu in your app by clicking on ‘triple line’ button in top left corner.
Open ‘eCozy Devices’ menu.
Choose eCozy thermostat which you would like to delete from the system and press and hold its name until the «delete» button appears.
Click on «delete» button and confirm or cancel your decision.
How to find specific eCozy thermostat?
How to find specific eCozy thermostat?
Open menu in your app by clicking on ‘triple line’ button in top left corner.
Open ‘eCozy Devices’ menu.
Click on the eCozy thermostat you would like to find.
Click on ‘find thermostat’.
Searching thermostat will blink with blue antenna for several seconds.
How to move eCozy thermostat to another room?
Open menu in your app by clicking on ‘triple line’ button in top left corner.
Open ‘eCozy Devices’ menu.
Click on the eCozy thermostat you would like to add to the room.
When you open a specific eCozy thermostat, there will be a possibility to choose a room to which you want that thermostat to be placed.
Simply click on the desired room.
How to set my «go away» temperature?
Open menu in your app by clicking on ‘triple line’ button in top left corner.
Open Settings menu by clicking on ‘Settings’ button.
Click on ‘Go Away’ button to edit the go away temperature.
Choose desired temperature for Go Away.
How should I setup Local Mode?
In order to setup Local Mode, you have to give a name to the WLAN network, which will be created by your eCozy Central Unit. After that, you have to create a 8 digit minimum password and confirm this password. After successful creation of the Local Mode, logo on eCozy Central Unit will blink white and blue, and after that it should light in Blue.
How to set my «warm up» temperature?
Open menu in your app by clicking on ‘triple line’ button in top left corner.
Open Settings menu by clicking on ‘Settings’ button.
Click on ‘Warm Up’ button to edit the warm up temperature.
Choose desired temperature for Warm Up.
How should I setup Remote Mode?
In order to setup Remote Mode, give your eCozy Central Unit a name, after you have to enter the exact name of your home WLAN network and exact password of your home WLAN network. After successful creation of the Remote Mode, logo on eCozy Central Unit will blink white and blue, and after that it should light in White, as well as one of LED on front side should light in green.
How to sign in into existing account?
Simply type in the email address and password from the account.
Is it possible to use eCozy App with more than one signed user?
Yes, you can use eCozy App on several devices with one registered account.
The room temperature shown in application and the real temperature in the room are different, why is it so?
Temperature shown on eCozy thermostat display and on the dashboard of eCozy App is your target temperature you would like to have.
What are the advantages of Local mode/Remote mode?
Local mode is necessary when you do not have an Internet access or due to security reasons do not wish to make your Central Unit available via the Internet.
Remote mode enables your Central Unit to connect to the existing WLAN network. It enables you to manage the Central Unit no matter where you are.
What are thermostat ‘locks’ and how to turn them on?
Thermostat ‘locks’ are designed to protect eCozy thermostats from unauthorized changes of the temperature and unauthorized dismantle of the thermostat from the water heating radiators. There are 3 stages of locks
Disable Control – user is able to check the temperature, but is unable to make any manual changes. Also, user is able to activate emergency dismantle.
Disable Indication – user is not able to check the temperature and not able to make any manual changes. However, user is able to activate emergency dismantle.
Disable Dismantling – user is not able to check the temperature, not able to make any manual changes and not able to activate emergency dismantle.
To turn on thermostat ‘locks’
Open menu in your app by clicking on ‘triple line’ button in top left corner.
Open Settings menu by clicking on ‘Settings’ button.
Swipe the button to the desired lock level.
What is «anti-fire» mode and how to turn it on?
‘Anti-fire’ mode is designed as an extra protection of your apartment. Thanks to two thermosensors in eCozy thermostats, they will constantly monitor temperature changes in the rooms. In case they notice very rapid temperature raise, they will notify you with a notification that something is wrong at your apartment.
To turn on ‘Anti-fire’ mode
Open menu in your app by clicking on ‘triple line’ button in top left corner.
Open Settings menu by clicking on ‘Settings’ button.
Click on the ‘anti-fire’ on/off button to turn it on or turn it off.
What is Central Unit ‘Illumination’ and how to turn it on?
Central Unit ‘Illumination’ is designed to highlight the visual aspects of the eCozy Central Unit. For example, it can be used as a night stand in kids room.
To turn on ‘Illumination’
Open menu in your app by clicking on ‘triple line’ button in top left corner.
Open Settings menu by clicking on ‘Settings’ button.
Click on the ‘illumination’ on/off button to turn it on or turn it off.
What is the title of my Central Unit?
You set the title during the process of the first initialization.
Where to download eCozy App?
eCozy App is available on AppStore and Android Market.
How do I switch on the heating while I am on my way home, so that when I am back it's all nice and warm already?
You can use “warm up mode” feature for that purpose, where you set a desired temperature and with turned on location services of your device, the system will know when you will be home, and start heating up accordingly to your arrival time.
How to activate «go away» mode?
Click on the ‘house’ button in top right corner.
In a pop up window click on ‘away’ button to activate the ‘go away’ mode.
How to activate «home» mode?
Click on the ‘house’ button in top right corner.
In a pop up window click on ‘home’ button to activate the ‘home’ mode.
How to activate «warm up» mode?
Your smartphone must be disconnected from the WLAN network your system is connected to.
Click on the ‘pin’ button in top right corner.
Choose the desired method of reaching your location.
Click on the ‘warm up’ button to activate ‘warm up’ mode.
How to add an extra eCozy thermostat?
Remove a battery compartment cover and set four AA-type batteries with respecting polarities.
Connect the battery compartment cover with the installed batteries to the thermostat housing. If the batteries are installed correctly, the thermostat indicator will display a green wrench key for a short time, which means that the valve piston rod moves to the extreme far position from the valve and after the icon is faded, the thermostat could be mounted on a radiator and can be connected to ZigBee network.
Place two finger on top and the bottom of the screen and keep them until blue antenna appears on the display.
Open menu in your app by clicking on ‘triple line’ button in top left corner.
Open ‘eCozy Devices’ menu.
Click on «add thermostat» and wait until eCozy thermostat is successfully connected to your system.
How to add eCozy thermostat to the room?
After you have successfully initialized eCozy thermostat into the system, you have to place that thermostat into the room.
You will have your list of available room on your screen.
Simply click on the desired room or create a new one.
How to add a scenario to the room?
Open the ‘room’ menu in your app by clicking on ‘rooms’ button in bottom left corner.
Click on the desired room you want to set scenario for.
Click on the ‘add scenario’ button to open the list of available scenarios.
Choose desired scenario and click on it.
How to change a temperature?
Click the left blue arrow to decrease the target temperature.
Click the right red arrow to increase the target temperature.
How to change the room on dashboard?
Swipe the temperature screen to the left or to the right to see the other rooms temperature or click on the desired room on the top of the screen.
How to check the temperature?
Click in the middle of the temperature to update the target temperature.
How to create a scenario?
Open the ‘scenario’ menu in your app by clicking on ‘scenarios’ button in bottom right corner.
Click on the ‘add scenario’ button to add a new scenario.
Rename new scenario if you want to.
Click on the ‘save’ to close edit mode.
Click on the new scenario.
Here you can observe the week schedule of the heating.
Click on the ‘pencil’ to activate edit mode.
Choose the desired day you want to create a schedule for and click on the ‘plus’ button.
Set the temperature points throughout the day the way you want them to be. There is a limit of 10 temperature points per day. For detailed temperature set, hold the temperature point to activate zoom.
After completion of setting temperature points, click on ‘plus’ button to copy the schedule for other days, or click on ‘tick’ button to finish.
How to delete a scenario?
Open the ‘scenario’ menu in your app by clicking on ‘scenarios’ button in bottom right corner.
Choose the scenario which you would like to delete and swipe its name to the left until the «delete» button appears.
Click on «delete» button and confirm or cancel your decision.
Toggle Title
How to delete eCozy thermostat?
Open menu in your app by clicking on ‘triple line’ button in top left corner.
Open ‘eCozy Devices’ menu.
Choose eCozy thermostat which you would like to delete from the system and press and hold its name until the «delete» button appears.
Click on «delete» button and confirm or cancel your decision.
How to find specific eCozy thermostat?
Open menu in your app by clicking on ‘triple line’ button in top left corner.
Open ‘eCozy Devices’ menu.
Click on the eCozy thermostat you would like to find.
Click on ‘find thermostat’.
Searching thermostat will blink with blue antenna for several seconds.
How to move eCozy thermostat to another room?
Open menu in your app by clicking on ‘triple line’ button in top left corner.
Open ‘eCozy Devices’ menu.
Click on the eCozy thermostat you would like to add to the room.
When you open a specific eCozy thermostat, there will be a possibility to choose a room to which you want that thermostat to be placed.
Simply click on the desired room.
How to set my «go away» temperature?
Open menu in your app by clicking on ‘triple line’ button in top left corner.
Open Settings menu by clicking on ‘Settings’ button.
Click on ‘Go Away’ button to edit the go away temperature.
Choose desired temperature for Go Away.
How to set my «warm up» temperature?
Open menu in your app by clicking on ‘triple line’ button in top left corner.
Open Settings menu by clicking on ‘Settings’ button.
Click on ‘Warm Up’ button to edit the warm up temperature.
Choose desired temperature for Warm Up.
What are thermostat ‘locks’ and how to turn them on?
Thermostat ‘locks’ are designed to protect eCozy thermostats from unauthorized changes of the temperature and unauthorized dismantle of the thermostat from the water heating radiators. There are 3 stages of locks
Disable Control – user is able to check the temperature, but is unable to make any manual changes. Also, user is able to activate emergency dismantle.
Disable Indication – user is not able to check the temperature and not able to make any manual changes. However, user is able to activate emergency dismantle.
Disable Dismantling – user is not able to check the temperature, not able to make any manual changes and not able to activate emergency dismantle.
To turn on thermostat ‘locks’
Open menu in your app by clicking on ‘triple line’ button in top left corner.
Open Settings menu by clicking on ‘Settings’ button.
Swipe the button to the desired lock level.
What is «anti-fire» mode and how to turn it on?
‘Anti-fire’ mode is designed as an extra protection of your apartment. Thanks to two thermosensors in eCozy thermostats, they will constantly monitor temperature changes in the rooms. In case they notice very rapid temperature raise, they will notify you with a notification that something is wrong at your apartment.
To turn on ‘Anti-fire’ mode
Open menu in your app by clicking on ‘triple line’ button in top left corner.
Open Settings menu by clicking on ‘Settings’ button.
Click on the ‘anti-fire’ on/off button to turn it on or turn it off.
Cannot sign up, what is the reason?
Check if you have entered your email correctly, and your password is not less than 8 symbols.
How to edit my profile?
Open menu in your app by clicking on ‘triple line’ button in top left corner.
Open ‘eCozy account’ menu.
Here you can observe and edit your profile settings such as your name, email address and password.
How to send a device and app log to eCozy Customer Support?
Open menu in your app by clicking on ‘triple line’ button in top left corner.
Open ‘Support’ menu.
Click on ‘Send Logs’ button to enter email settings.
Add additional information with the description of the problem.
Send email.
How to sign in into existing account?
Simply type in the email address and password from the account.
What happens in case of internet connection loss, and how can I control it during such time?
In case of Internet connection loss, you will not be able to control your system from your smartphone. However, you are able to change the temperature manually on eCozy thermostats. Also, in case system was working under a scenario, it will continue doing so.
Videos
iOS
- How do I choose which mode I want my system to be in?
- How do I connect to eCozy Central Unit?
- How should I setup Local Mode?
- How should I setup Remote Mode?
- How to add a new room?
- How to add eCozy thermostat to the room?
- How to add an extra eCozy thermostat?
- How to change the name of the location?
- How to check who was/is connected to the app?
- How to create an account?
- How to delete eCozy thermostat?
- How to delete a room?
- How to delete a scenario?
- How to edit my profile?
- How to add first eCozy thermostat?
- How to move eCozy thermostat to another room?
- How to name specific connected device?
- How to rename eCozy thermostat?
- How to rename a room?
- How to rename a scenario?
- How to sign in into existing account?
- What is «anti-fire» mode and how to turn it on?
- What is Central Unit ‘Illumination’ and how to turn it on?
- How to activate «go away» mode?
- How to activate «home» mode?
- How to activate «warm up» mode?
- How to add a scenario to the room?
- How to change a temperature?
- How to change the room on dashboard?
- How to check the temperature?
- How to create a scenario?
- How to find specific eCozy thermostat?
- How to move eCozy thermostat to another room?
- How to rename a scenario?
- How to set my «go away» temperature?
- How to set my «warm up» temperature?
- What are thermostat ‘locks’ and how to turn them on?
- How to edit my profile?
- How to send a device and app log to eCozy Customer Support?
Android
- How to add an extra eCozy thermostat?
- How do I choose which mode I want my system to be in?
- How do I connect to eCozy Central Unit?
- How to add a new room?
- How to add eCozy thermostat to the room?
- How to add first eCozy thermostat?
- How to change the name of the location?
- How to check who was/is connected to the app?
- How to create an account?
- How to edit my profile?
- How to delete a room?
- How to name specific connected device?
- How to rename a room?
- How to rename a scenario?
- How to delete eCozy thermostat?
- How to find specific eCozy thermostat?
- How to move eCozy thermostat to another room?
- How to set my «go away» temperature?
- How should I setup Local Mode?
- How to set my «warm up» temperature?
- How should I setup Remote Mode?
- How to sign in into existing account?
- What are thermostat ‘locks’ and how to turn them on?
- What is «anti-fire» mode and how to turn it on?
- What is Central Unit ‘Illumination’ and how to turn it on?
- How to activate «go away» mode?
- How to activate «home» mode?
- How to activate «warm up» mode?
- How to add an extra eCozy thermostat?
- How to add eCozy thermostat to the room?
- How to add a scenario to the room?
- How to change a temperature?
- How to change the room on dashboard?
- How to check the temperature?
- How to create a scenario?
- How to delete a scenario?
- How to delete eCozy thermostat?
- How to find specific eCozy thermostat?
- How to move eCozy thermostat to another room?
- How to set my «go away» temperature?
- How to set my «warm up» temperature?
- What are thermostat ‘locks’ and how to turn them on?
- What is «anti-fire» mode and how to turn it on?
- How to edit my profile?
- How to send a device and app log to eCozy Customer Support?
- How to sign in into existing account?